Few things taste better than fresh fruit. Sure, chocolate is divine, but a fresh, juicy strawberry? Heavenly! And we bet your baby agrees. She’s bound to love the natural sweetness of fruit, and you’re bound to love the loads of vitamins and minerals that fresh fruit provides.
One of the best ways to ensure that your baby is getting plenty of fresh fruit in her diet is to make some fruit purees yourself. Use the recipes below to get started.
For information on when to introduce specific fruits into your baby’s diet, along with serving sizes, visit our solid food charts.
For information on whether or not you should invest in organic fruits, visit our post comparing organic and non-organic products.
For tips on how to cook your fruit, visit our cooking techniques page.
For tips on how to puree your fruit, visit our pureeing techniques page.
Let’s get cooking!
Mashed Bananas/Avocados (introduce at 4-6 months)

To pick a ripe avocado: look for avocados with dark green skin. You can also check for ripeness by doing a “thumb test.” Press the avocado with your thumb; if it leaves a small indentation, the avocado’s ripe.
- 1 ripe banana (ripe bananas work best; they mash easily and tend to have a sweeter flavor.)
- OR
- 1 ripe avocado (see note for information on how to choose a ripe avocado.)
- Peel the banana. If using an avocado, cut the avocado in half and remove the stone in the center. Cut the banana into several large chunks, and place the chunks in a small dish. If using an avocado, scoop the avocado from the skin using a spoon.
- Mash the banana or avocado with a fork or a potato masher. You can thin with breastmilk or formula, if necessary.
You can freeze mashed banana of avocado the same way you’d freeze any other fruit puree. You’ll simply need to add a little lemon juice to prevent browning. However, given how easy it is to mash bananas and avocados, you’ll probably prefer to make them fresh each time you serve them to your baby.
Homemade Applesauce (introduce at 4-6 months)
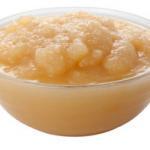
- Several apples (cooking apples are best, as they retain their flavor and texture better. Click here for a listing of good cooking apples.)
- Wash, peel, and core the apples. Then, cut the apples into medium-sized chunks.
- Boil or steam apple chunks until tender. If boiling, reserve the cooking water.
- Allow apples to cool; then, puree them, adding breastmilk, formula, or water (use cooking water if apples were boiled) to achieve your desired consistency.
Applesauce is one of the few store-bought products that’s almost identical to the homemade version. If you simply don’t have time to make your own applesauce, buying it is perfectly okay, so long as you buy the “good” kind! Look for applesauce that’s labeled “natural” or “no sugar added”. The only ingredients listed should be apples, water, and ascorbic acid (Vitamin C). Avoid applesauce that has any added flavors or sugars (like high fructose corn syrup).
Homemade Pear Puree (introduce at 4-6 months)
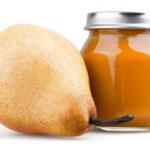
- Several ripe pears
- Wash, peel, and core the pear. Then, cut the pear into medium-sized chunks.
- Boil or steam the pear chunks until tender. If boiling, reserve the cooking water.
- Allow pears to cool; then, puree them, adding breastmilk, formula, or water (use cooking water if pears were boiled) to achieve your desired consistency.
Homemade Peach, Nectarine, Apricot, or Plum Puree (introduce at 7-8 months)
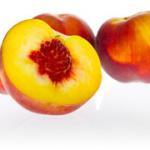
- Several ripe peaches (nectarines, or plums)
Baking Method:
- Wash fruit. Cut in half and remove the pit from the center.
- Pour 1/2 an inch of water into a baking dish; place fruit cut-side down in dish.
- Bake at 375 – 400 until the fruit is tender and the skin begins to pucker and wrinkle.
- Peel skin from fruit. (If the skin seems soft enough, you can simply leave it on).
- Allow fruit to cool; then, puree it, adding breastmilk, formula, or water to achieve your desired consistency.
Blanching Method:
- Fill a large pot halfway full of water. Bring to a boil.
- Wash the fruit. Add fruit to water; boil for 4-5 minutes.
- Peel the skin from the fruit. (If the skin seems soft enough, you can simply leave it on.)
- Cut the fruit in half and remove the pits from the center.
- Allow fruit to cool; then, puree it, adding breastmilk, formula, or water to achieve your desired consistency.
Apricot and plum purees can be slightly bitter. If this is the case, you can add a bit of white grape juice as you puree; this will offset any bitterness.
Homemade Mango/Papaya Puree (introduce at 7-8 months)
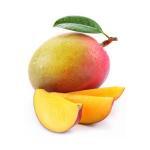
Mangos are ripe when their skin changes from green to a golden-red and when they’re “thumb tender” (when you press your thumb into the fruit, it leaves a small indentation). Papayas are ripe when their skin turns golden, and then they’re thumb tender.
- 1 ripe mango or papaya (see note for information on how to pick a ripe mango or papaya)
- Peel and de-seed the fruit. Then, cut the fruit into chunks.
- At this point, you can simply mash the raw chunks and serve it to your baby. If you prefer to cook the fruit (to make it a bit softer, or to break down the sugars making it easier for your baby to digest), simply steam the chunks until tender (5-7 minutes).
- If cooking, allow the fruit to cool. The puree it, adding breastmilk, formula, or water to achieve your desired consistency.
Homemade Blueberry Puree (introduce at 9-10 months)
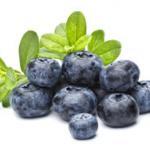
- 1/2 – 1 pint blueberries (fresh or frozen)
- 1/2 – 1 cup water
- Rinse the blueberries well (skip this step if using frozen).
- Boil or steam the blueberries until tender. If boiling, reserve the cooking water.
- Allow the blueberries to cool; then, puree them, adding breastmilk, formula, or water (use cooking water if pears were boiled) to achieve your desired consistency.
You can also leave the blueberries raw and simply mash them well with a fork, since by 9 months, your baby is ready for more texture in his food anyway.
Mashed Melons — Honeydew, Watermelon, or Cantaloupe (introduce at 9-10 months)
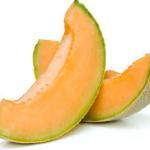
- 1 melon
- Slice the melon. Cut the melon from the rind, removing any seeds.
- Cut the melon into small chunks and mashed with a fork.
Mashed Kiwi (introduce at 9-10 months)
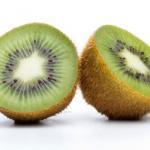
- Several ripe kiwi
- Peel the kiwi; then, cut into small chunks.
- Mash the kiwi with a fork. You don’t have to remove the seeds; by this age, your baby should be able to tolerate the added texture, and the seeds themselves are digestible.
Fruit purees and mashes are delicious alone, but they can be even tastier combined (once your baby’s old enough for mixed foods). Blueberry applesauce? Peachy mashed bananas? Kiwi mango tango? The sky’s the limit! What’s more, fruit is a delicious “add-in” — add it to baby cereal, or to cottage cheese and yogurt.
For tips on how to safely and conveniently store your homemade fruit purees, visit our food storage page.
Everything You Need To Know About Starting Solids – All In One e-Book!
 What if you could find everything you needed to know about starting your baby on solid foods – when it’s best to start solids, how to introduce solids, complications, food allergies, etc. – in one easy-reference guide? Now you can! Your Baby’s Start To Solid Foods: A Comprehensive Guide will walk you through every step of starting solids. Plus, your e-Book package includes several bonus materials, designed to maximize your success in starting solids. You’ll get a thorough guide to treating constipation, a dietitian’s advice on how to avoid 5 common solid-foods mistakes, and a weekly meal plan for your baby’s first year. Grab your e-Book today, and ensure your baby has the healthiest possible start to solid foods!
What are your baby’s favorite fruits? Any favorite fruit recipes? Share them below!